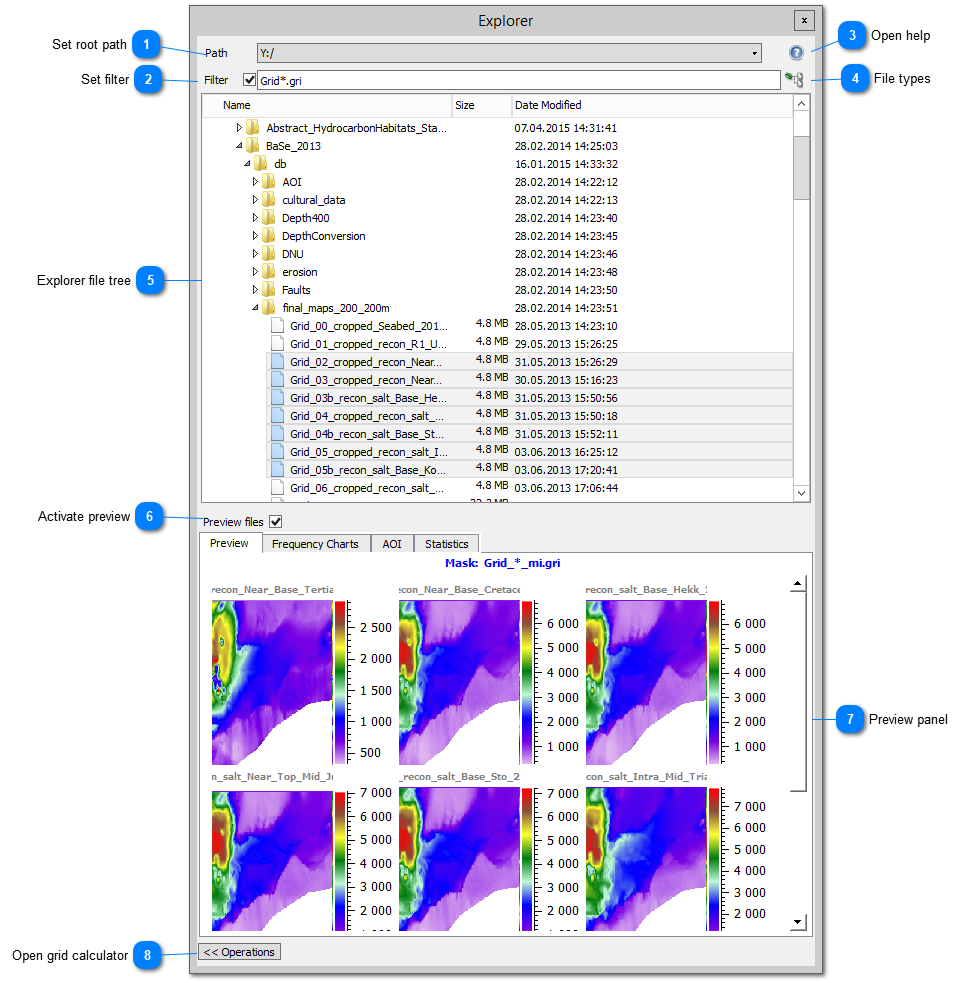
The Explorer Window (Figure 5.43) offers functionality to view, open, and convert various file types utilized in MigriX. You can access it by selecting Windows->Explorer from the top-level menu in MigriX. The window is divided into two sections: the upper section features a tree view for selecting files, while the lower section provides a preview of the contents of selected files and displays statistical information. The Explorer window can also be used for performing grid operationsthrough Grid mathematics.
There are several file-related options available, including Convert Files, which enables you to convert various input file types (e.g., grids, logs, points, etc.) into standard MigriX formats. You can also use the Edit aliases utility to associate columns in CSV files with aliases recognized by MigriX.
Figure 5.43 The Explorer window.
Set root path
Choose which network drive to use as root path in the file tree (Windows version only). In order to access external file systems, these must first be mapped as network drives in Windows.
Apply a filename filter in order to reduce the number of items shown in the tree view. If not used, all files with recognized file subfixes (e.g. .pol, .gri, .dat) will be shown.
This option will open the File Types dialog (Figure 2.76).where the user can specify associations for different file type based on the filename subfix. Note that changes made in this dialog are not yet persistent, and will revert to the default values the next time MigriX is opened
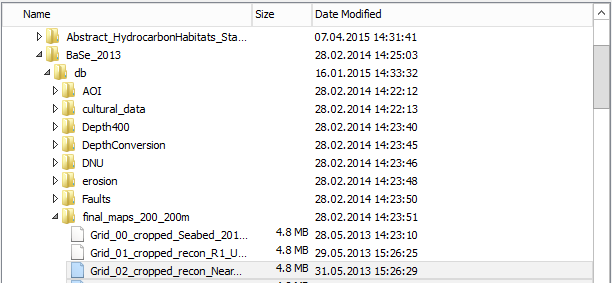
This window contains the file tree. By default, it will be opened in the db directory for the currently active project. Several different options are available from the right mouse button menu in the file browser, depending on the selected file types. For e.g. grid files, the user may choose to:
Create a new MigriX project based on the selected grids (depth maps). This will open the Geological Events table editor.
Open the files in an associated external program.
Convert files to a standard MigriX format using the Convert Files tool. This option can also be used to resample the grids a different AOI.
Create a csv textfile containing the selected filenames.
Set the file filter to match the currently selected files.
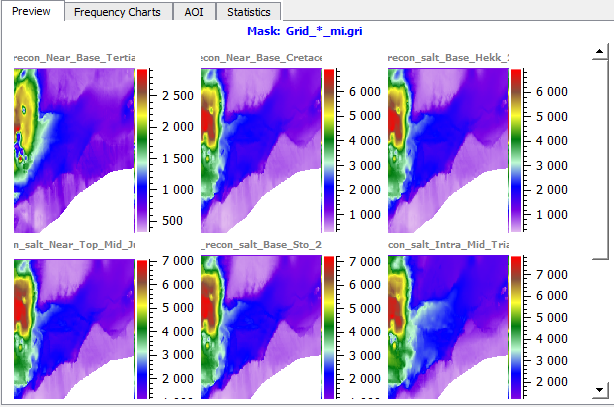
The Preview panel contains four tabs: Preview,Frequency Charts, AOI and Statistics.
The Preview tab shows thumbnail previews of the currently highlighted files in the tree view. The main input and output file types are supported by the previewer, including tables, text, images and grids. The Frequency Charts tab contains histograms showing the z-value distribution in grid files selected for preview.
The AOI panel shows a table view of the area-of-interest info for the selected files, where available. The Statistics tab shows more extensive statistical data for the files, including e.g. mean and standard deviation values for grid files.